
After a bunch of experimentation, a few close calls with a box knife, a mess of cardboard littering my floor, and hours of work with a handful of Sharpies and acrylic paint, I think I managed to pull it off. It may not look exactly like 'art,' but anytime I spend that many hours drawing and painting, I call it art! In the end I even enjoyed making it. I don't get out paint very often, but I almost always enjoy it when I do. My right brain needs this kind of stuff every once in a while! :)
In case you find yourself needing a Lego man costume, here’s what I ended up doing!
Materials:
- Box cutter

- Giant jug of pretzels
- Hat, with chin strap if possible (OR a hummus tub for a hat-less man)
- Hole puncher
- Yellow tights
- Cardboard
- Elmer's glue
- Paint/Markers

Instructions:
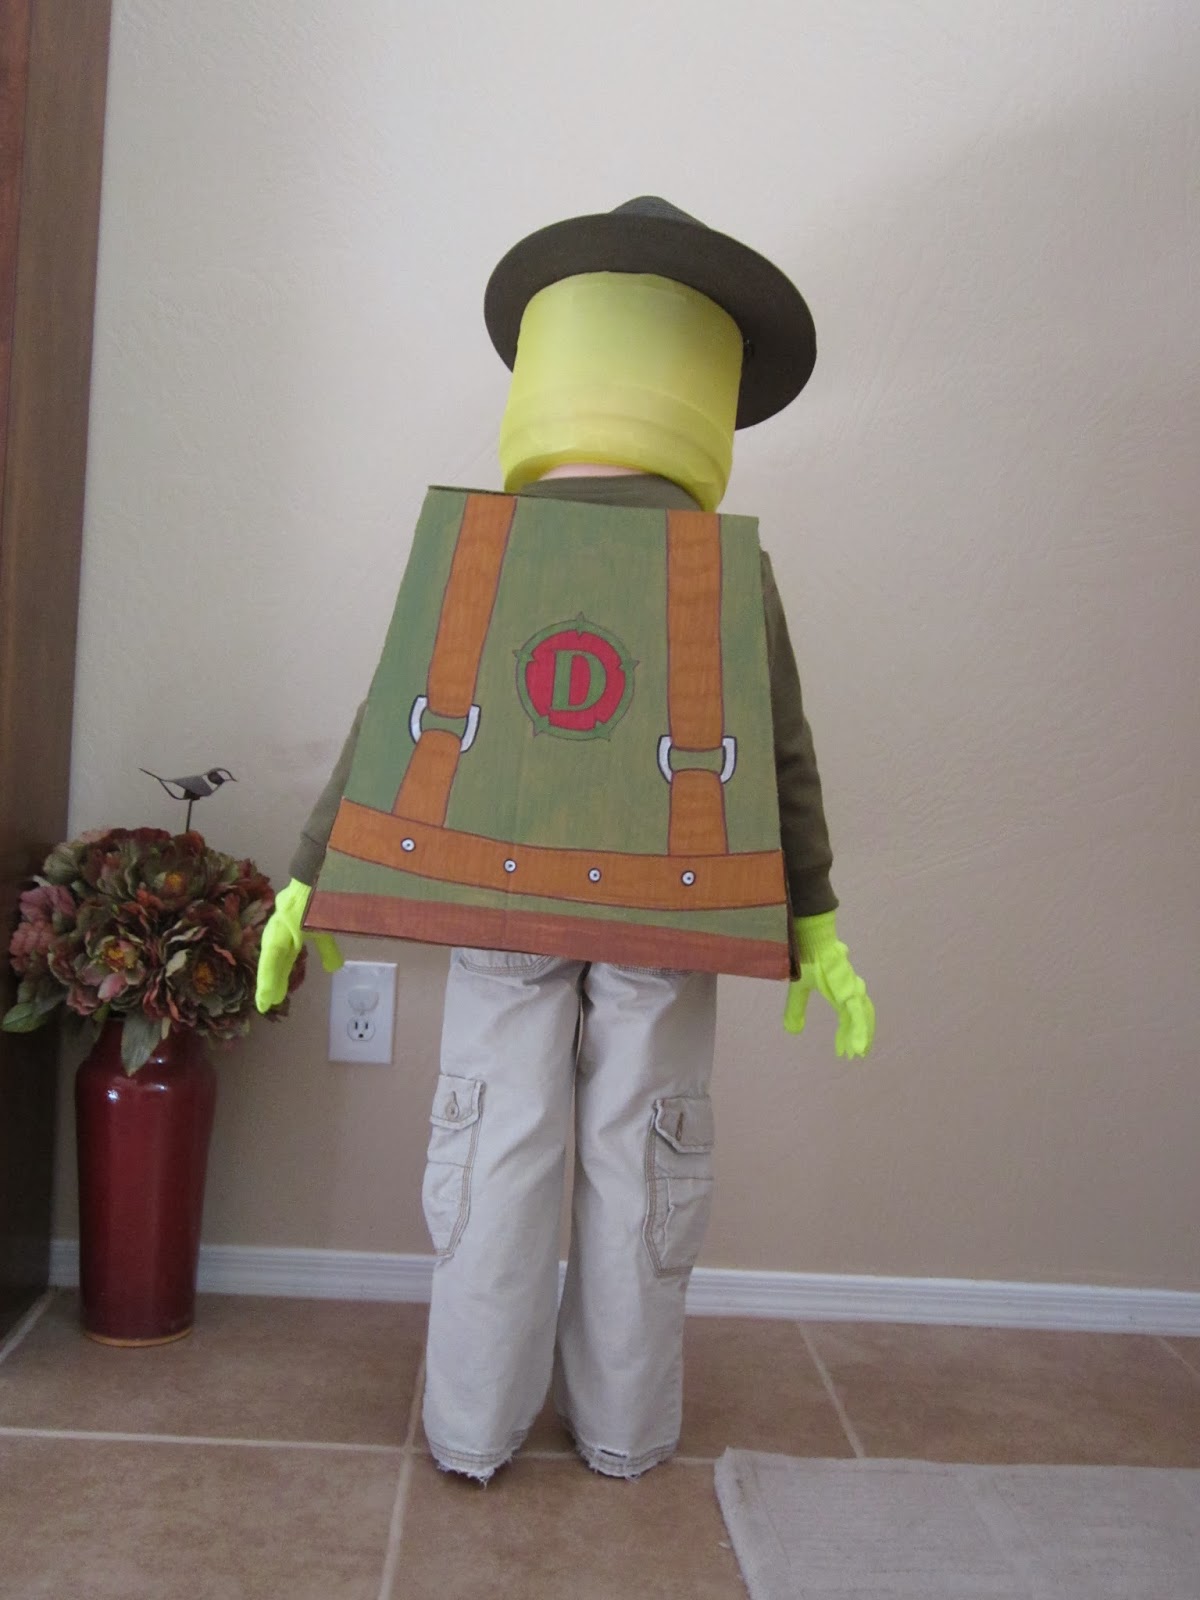
Start with the Lego Head:
 |
| For a Hat-less Lego Man |
- I bought a giant jug of pretzels on emptied it into ziplock bags. I cut off just enough of the top of the jug that an adult head would fit in it (I wanted plenty of ventilation for my 6 year old).
- Since my Lego man would have a hat, I also cut off 3 inches of the bottom, so the proportions would look right once the hat was stacked on top of the tub. Now I was left with a 7 or 8 inch tall cylinder of clear plastic. (If you want to go hatless, which I contemplated, I think an empty hummus tub (minus the lid) stacked on the bottomof the jug made a nice top nob.)
- Optional: I trimmed some of the ‘trash’ plastic ring I had cut off into a 1 inch plastic ring and taped it inside my large cylinder to add a little more structural support.
- Next, since my hat had an awesome chin strap, I punched holes for the straps about an inch from the top of my cylinder. I used a heavy-duty hole puncher and cut a series of holes, so I ended up with a shape that the straps fit through.

- Now the fun part. Draw a face on a piece of paper.
- Cut off one leg of the tights high up on the leg, but without any of the reinforced thick part.
- Hold the paper on the outside of the cylinder and stretch the tights over the cylinder with the paper between the plastic and the tights. Try not to snag the tights! (Have someone help you on this step- a 6 year old seemed to do well). Make sure the paper face is centered between your two chin strap holes
- Using markers, trace your face onto your tights. Yes, drawing on tights is tricky, but you can do it!
- Carefully remove the paper face.

- Paint clear nail polish over the chin strap holes. Let it dry. Use your box cutter to cut a hole in the stocking at the chin strap hole. (The nail polish keeps the tights from ‘running’ and making that little hole you just cut into a giant hole.)
- Cut off the rest of the tights so they just barely cover over the top and bottom edge of the cylinder.
- Set the hat on the cylinder and thread the chin straps through! Your head is done!


- Cut out cardboard like shown. (Save the scraps.) I’m giving you the dimensions for my body, but you might need to adjust them depending on the size of the person wearing the costume. My son is 46 inches tall.
- Create hinges out of cardboard by cutting pieces near the folds in the scrap of cardboard.
- Attach cardboard ‘hinges’ to the top and bottom piece. (If you'll use a clamp to apply pressure, and a few blocks to apply the pressure evenly, you'll get a better bond with the glue.)

- Draw your design onto the front and back pieces using paint or markets. Let it dry.
- Paint/color the top and bottom piece to match the Lego man model.
- Glue the front and back piece to the top piece using the blocks and clamps again. Let it dry overnight. Glue the bottom on and let it dry again.

